
 Custom Photoshop Brushes kind of work like rubber stamps. They add background texture or foreground interest to your work. The Prickle Wrath graphic on this blog was made with a Photoshop brush with text layered on top. Here's how to create your own.
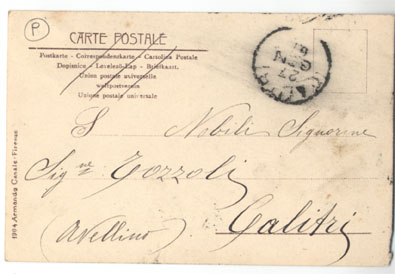 1) Find a cool graphic or scan some ephemera. Handwritten text works well, or stains, drops of ink, old ledgers, whatever. I like to use something with white in the background because it appears clear when you use the brush.
Here's the back of a postcard that I scanned. I'll use it as an example.
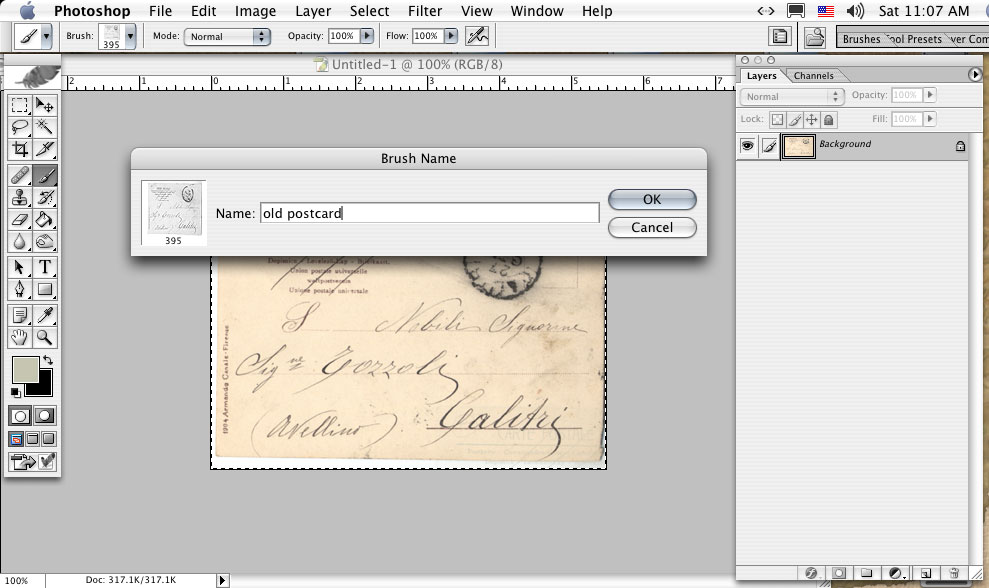 2) Open it up in Photoshop, select all, and then from the top menu: edit/define brush preset. Name it something and then click okay.
3) Create a new document, I filled mine with black. Create a new layer. Then choose a great color for your "stamp" by setting your foreground color.
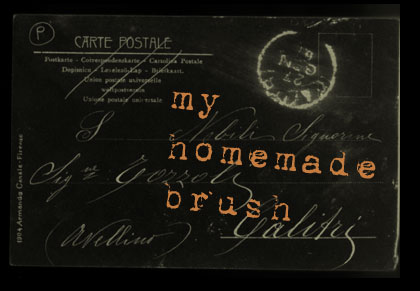
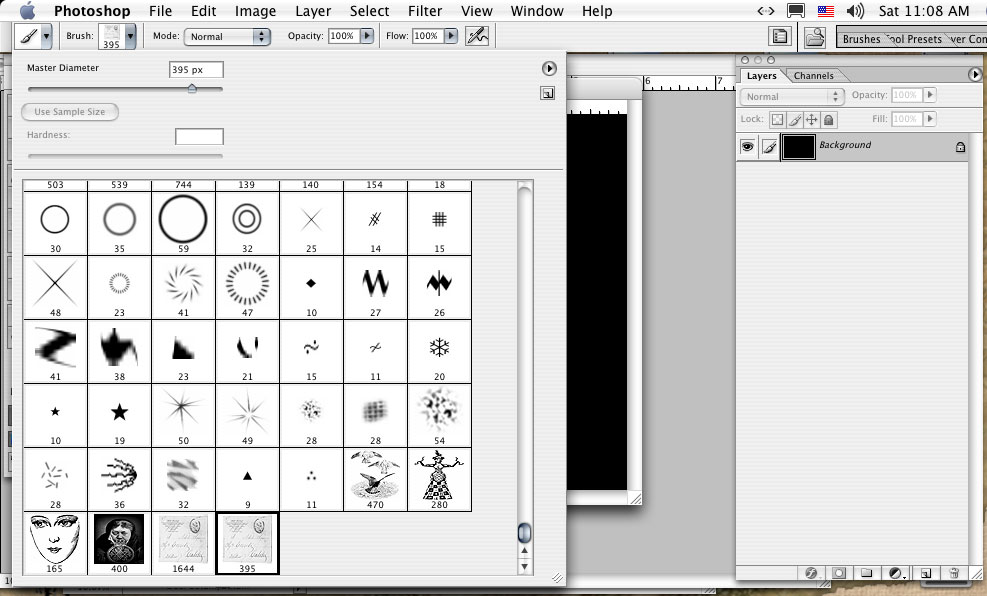 4) select the brush tool from the tools palette and find the brush you just created in the brush presets in the top menu bar. Place it and click. Voila.
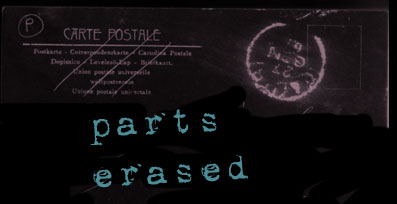 You can layer brush stamps on your image, play with the opacity of the layers, change the hue of the layer, rotate, scale, erase parts of the "stamp" and use filters to create effects. The brush can be used as an eraser too to erase through an image. Cool trick, no?
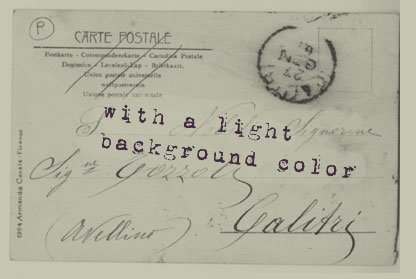 If you have any questions use the comments response below. I'll answer what I can. But I have to say, I can't teach you Photoshop basics on this blog. It'd take forever. This tip is for artists who have already mastered the basics. And its well worth the learning curve. Photoshop is an awesome tool.


No comments:
Post a Comment